Showing posts with label diy. Show all posts

Tuesday, July 10, 2012

DIY: Fabric Boards

I've had a few people ask me about my fabric boards, so here is a special DIY post!  I feel silly writing this post because (1) I'm sure I'm not the first person to create this and (2) it's SO easy that you could definitely figure it out for yourself.  But here we go!


Things you need

1. WOOD
Mine was wood leftover from making cabinets for our last place (heavier wood than I'd prefer, but free!).  If you're lucky enough to know someone who always has random wood and things around their workshop (like my dad), that's always best because it's cheap to free.  If not, go to Lowe's or Home Depot and pick out some wood!  It's intimidating for a girl (I know from experience), because likely you really don't know what you're doing.  So ask a nice employee to help you.  They will even cut it for you for free (just make sure you know what dimensions you want!).  You can also use an old cork board... be resourceful!  If you've had success with a certain type of wood, share in a comment.


2. FABRIC GLUE
Get some.  I used Elmer's Multi-Purpose Spray Adhesive because that's what my wonderful art teacher friend gave me.  Worked perfectly.  Looks like this...


3. FABRIC
Mine is upholstery fabric from Hobby Lobby, and costed a little more than I would've liked ($40ish I think), but it was the only fabric I found that I LOVED and met all my specifications (had to match black and brown, but still be colorful and fun and make me happy).  It doesn't have to be fancy fabric, as long as you like how it looks!

4. SCISSORS
'Nuff said.

5. HANGING HARDWARE
The wire kind would be best, but I didn't have any and was impatient and didn't want to go to the store, so I used two of these kind (and boy are they a pain!)...


Directions:
(Sorry there aren't more helpful pictures- I wasn't planning on blogging this at the time!)


Step 1:  Lay out the fabric.  Lay the wood out on the fabric.  Make sure there's enough room to reach at least all the way over the sides!  Cut the fabric.  
Step 2:  (I recommend putting down newspaper or trash bags first, and doing this in the garage.  Otherwise, your floor gets sticky.  Don't ask how I know this.)  Spray the fabric glue on the wood and CAREFULLY press on the fabric.  It's hard to take off if you put it on wrong.  Make sure you spray it on extra thick on the side so it's nice and... stick-on-able.  Fold the fabric over the edges and smooth it out.         

Step 3:  Let it dry!  (Easiest step, right?)

Step 4:  Install the hanging hardware on the back.  I suppose this could also work well as Step 0 (before Step 1).  Might want to use a tape measurer and/or level to make sure you get it right!

Step 5:  Hang it/them and behold!  I think it works really well to liven up our ugly rent-white walls and fill a big space!


Let me know if you have any questions!


Sunday, July 17, 2011

Extreme Makeover: BARN Edition


We sweated, we hammered, we mudded, textured, tiled, grouted, carpeted, painted, scrubbed, bleached, insulated, cleaned, and worked our little tooshies off, and finally- finally- moved into... a... barn. We've lived in our lovely hippy-pad for a bit over a month now, and we love it. Also, thank goodness we bought good air conditioning, or we would be in a puddle on the floor. But yes, the time has come to post before-and-after pictures... and explanations, so this could potentially get lengthy. FYI, the "before" ones were with my iPhone camera, the "after" were with my real camera (in case you wondered about the quality difference).

Allow me to first give you a wee bit of background on this place. Thirteen-ish years ago, my parents decided to build a house in the country (we hated living in "the city"). They bought 40 acres and planned to build a beautiful house. While building said beautiful house, they built a small red metal building to subside in until the house was finished. The "barn" was, as I said, made of metal, and had bare concrete floors and one big room and a bathroom, and one window air unit. There were chickens and other animals just outside, and, well, it wasn't the most pleasant summer of my life. It has since functioned mostly as my dad's workshop as well as an occasional animal residence and general mulit-purpose building. It has evolved since then, adding a few more walls, flooring, drop ceiling, and recessed lighting. And from the time we started remodeling, it took about two months to complete.

Let's start with the front door and go to the left from there.
There is a set of double doors here, but the right one is covered by a curtain. I used chalkboard paint to paint the left one. Not too expensive, works great so far. I can write great verses and stuff, or honey-do lists for Michael :P.

Living Room
before->
after->

Major Efforts in the Living Room:
Mudding and texturing walls, replacing air conditioning hole with glass for window, removing door, installing large window.
Here's a close-up of the wall texture.
It takes a lot of time to do a whole room of this. I mudded while Michael went behind and textured with a trowel.

I love my new window. And it was only like $40 dollars. You can see our portable air conditioning unit peeking out. It works wonders- 105 degrees outside and perfectly cool in here.


Laundry Closet

Major Efforts in Laundry Closet:
Building it. And putting on doors.

Kitchen (brace yourself, this one is especially major!)


This is the other side of the kitchen. I wish I had more before pics- just trust me, it didn't look pretty!

Here's a closer-up of the backsplash and counters. All of this stuff was leftover from my sis and bro-in-law's house, which was leftover from something his uncle built. My uncle was getting rid of this stovetop. Not bad for hand-me-down materials, huh?


Major Efforts in Kitchen:
Everything. Building cabinets, installing stove, tile backsplash, granite countertops, electrical work, new light over sink, texturing, painting, new handles and nobs. Everything. But oh the difference now!

And now to the last area of the main room (yes, this has all been one big room so far)...
Office/Music room

(Same "major efforts" as living room). The unused doors are covered with curtains.


Bathroom


Major Efforts in Bathroom:
Texturing, painting, installing new toilet, fixing tub, building closet for hot water heater, enclosing loose pipes/wires/whatever that was in the ceiling, adjusting vanity size, installing cabinets that were in kitchen, stenciling/painting cabinets.
Here's the texture I did- light coat of sheetrock mud, then paintbrush in circles on it.


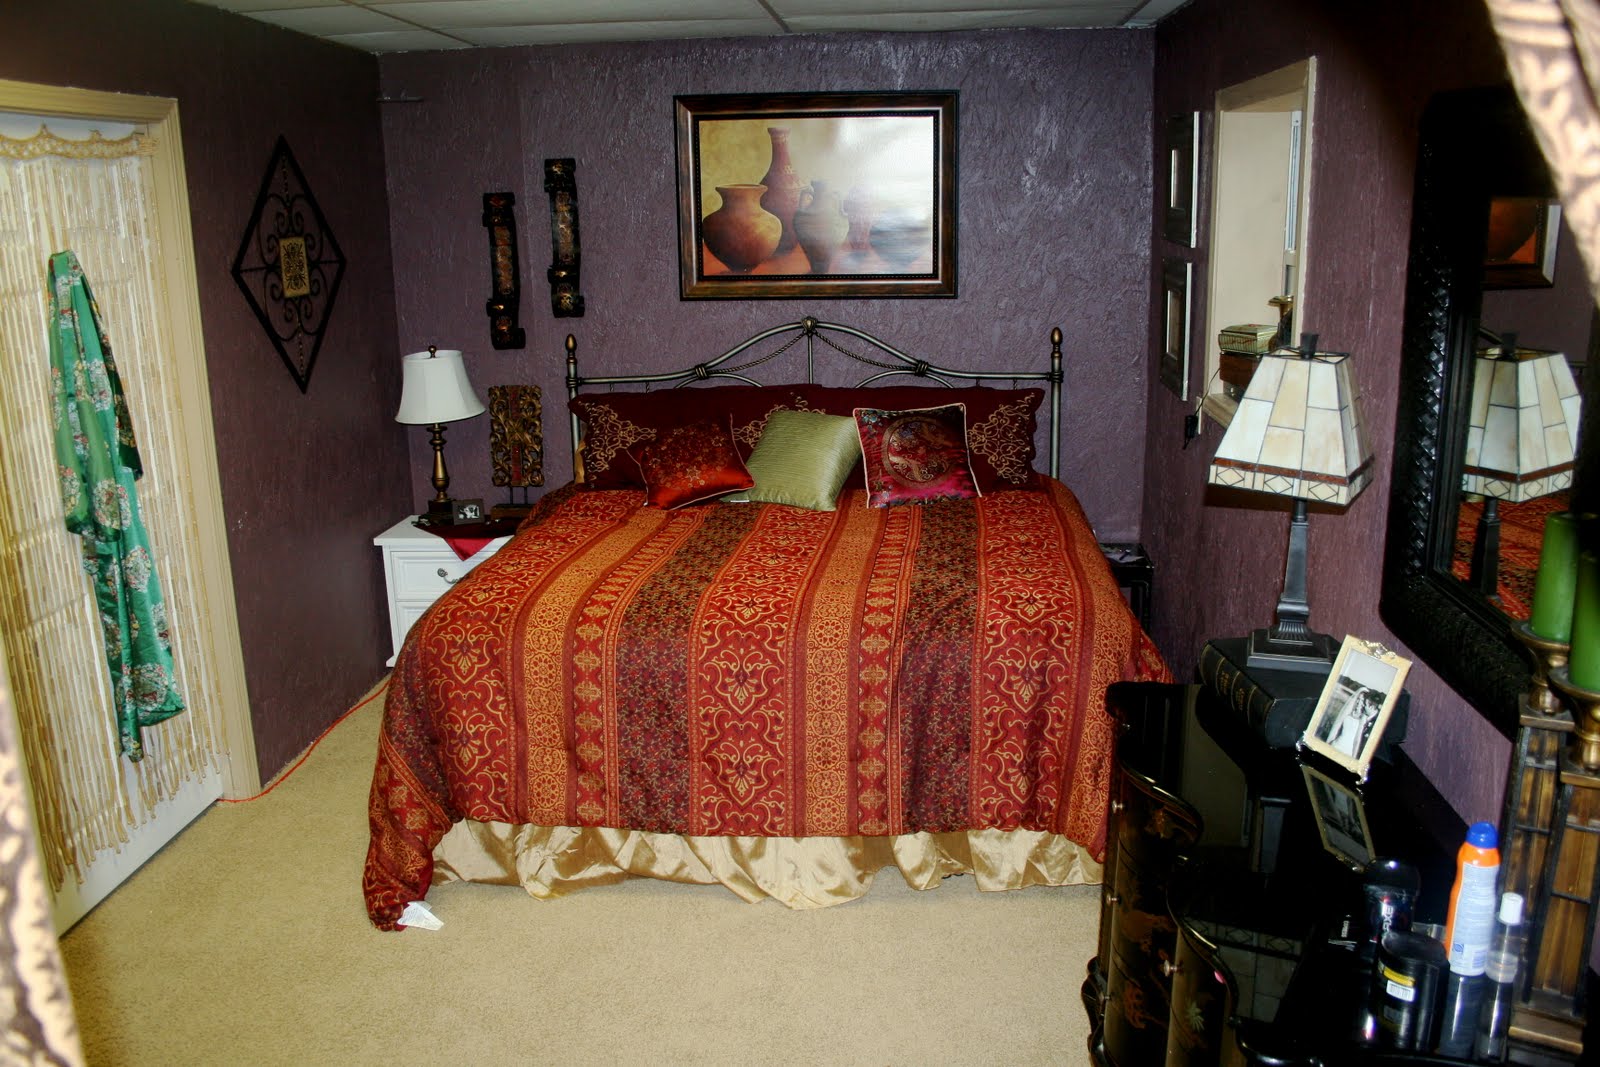
Bedroom

Much tidier, no?


The other side. The closet is behind the curtain.

Major Efforts in Bedroom:
Building a new building to put all the workshop stuff in (Dad does the building, by the way), moving all the stuff, cleaning after all the stuff, cleaning more, carpeting, rewiring lights.
Same texture as in living room.


Closet
For the "before", just go look at the bedroom "before" picture. It was pretty much the same thing.


^This is my little "dressing area"- has my makeup and hair stuff

So that's about it! LOTS of hard work. And LOTS of no fun. But, what does Delta think?


I think she likes it here.